Showing posts with label Sewing. Show all posts

Monday, May 16, 2011

Flower Pillow Part 2


It has definitely been a crazy couple of months.  Work hasn’t been good and I have been tirelessly looking for something new, but to no avail.  My dream is to move to never ending summer in Phoenix, but the job market doesn’t seem to be cooperating.  

During my breaks of looking for a new job, I have been trying to finish up my half started projects and I think I’ve done a pretty good job.  My two nephews finally got their Monster Albums (I have now made six of these quiet books, I found the pattern on youcanmakethis.com and love it after I made a few alterations of course), my youngest niece got an adorable lady bug pillow for her birthday and I finished a really cute portfolio for my oldest niece’s birthday (I’ll be posting that one soon).  I have also finally finished my flower pillow, you were probably starting to wonder if I ever would, don’t worry, you aren’t alone.

Here are the final steps and the final product.  I LOVE it!

Monday, April 25, 2011

Infant Carseat Canopy

With the approaching arrival of a new little one, my brain has been focused on baby.  I love the carseat canopies that have been so popular lately and wanted to make sure to have one with this baby.  My husband plays softball all summer so I needed something to help keep the sun, wind and dirt off my newborn and knew this would do the trick.  You can use cotton or flannel depending on what type of weather you are going to experience when you need it.  I used cotton since it is for a summer baby. 
P4250098

Brag Moment

I have been MIA for awhile and I really do have a reason.  Every spare minute I have had has been used getting a quilt ready for this little one…

P4160033

I am now done with the quilt top and can focus on other projects and getting ready for the arrival of our little boy in June!  Once he arrives, I will post a picture of the finished quilt (after being quilted and bound) and our little bundle modeling it!  I LOVE how the quilt top turned out and had to share!  I found this pattern at a Quilt Shop Hop a few years back and fell in love!  When I found out I was pregnant, I knew that if it was a boy I had to do this quilt.  It was intimidating at first but not too bad once I finally got started.  It was worth every second of work I put into it.  If you would like the pattern or to see what other fun quilts the designer has done, it is done by Chitter Chatter Designs.  And now for my bragging moment….my super cute quilt top!!!!!!

  P4200036

jenni

Friday, January 21, 2011

New Year New Projects? and Ribbon Flower Pillow Part 1

A couple of weeks before Christmas Mom IM'd me and asked me how many projects I was currently working on.  I started to list off everything that I could think of, then remembered a few more later that day.  I have quite a few that have either been started, or had materials purchased for, but were never finished for one reason or another.

So, my New Year's resolution is to finish ALL my current projects before starting any new ones (well, minus birthday presents, I still need to do those).  For some (well, most) of these projects I won't have pictures throughout the entire project, but I will post what I can.  I figured this way, I will have a little more motivation to get them all done :)

To start, here is my first project.  This one started out with an idea and then we found the cutest ribbon (I'm starting to really like ribbon, there are so many fun styles out there) and it was all decided.  It isn't quite finished, but I plan to finish it this weekend.  But to start, here it is:

Ribbon Flower Pillow:

This is what it currently looks like.  If you haven't guessed by now, I love flowers, pretty much any kind of flower.  Though orchids are my absolute favorites and always will be.  But they are a little more difficult to figure out how to mimic with ribbon, if anyone has an idea, I'd love to hear it.  Okay, so now that I have digressed from the project, maybe that's why I have so many half finished ones :), let's get back to the instructions.

Saturday, January 15, 2011

Painted Pillow Top

January becomes a ‘work on house’ month because of the cold. Who wants to go outside, the holidays are over so I have time to make things for the house. To be honest I usually paint a room or two but I have a couple weeks before I can do that. And I’ve looked at these pillows on many websites but the price is a lot higher than I’m willing to pay so I figured I’d just make my own. I live in a small rural town at the foot of the mountains but my heart is always on the beach. I decided many years ago it doesn’t matter where you live make your house the one you want to go home to. So mine is a beach house.


Monday, January 10, 2011

A Man's blanket

It's me again!  And no, I'm not done with the closet redo, I'm not that good.  But it is still at the top of the priority list this week (with a couple other things).  One of those other things being, a blanket for my husband.  I have recently decided to join in the contest at the Modern Quilt Guild, go here to check it out.  BUT, my husband has been asking for a blanket for a while, 5 years maybe, and it keeps not getting done.  So I finally bought him the fabric for Christmas and figured I best get his blanket done first.  If I start on another one before it's done, he might leave me!  Ok, not really, but I'm sure some of you understand.


Monday, December 13, 2010

Christmas Stitchery!

So I am a little slow posting and my project isn’t done….I do have a good excuse though.  I have a very sick little girl and I have been holding her and watching cartoons for two days.  Her dad is home now so I have done the switch off and figured I would post what I have so far while I get the chance.  I haven’t had much creativity this month or projects in mind so this project is off of another site that I love.  A few months back I wanted a new hobby that wasn’t expensive since I can’t really afford to make quilt after quilt even though I wish I could!  I love the look of stitchery so figured I would give it a try and I am hooked!  I love that it is quick, easy and I can do it anywhere!  I found a site that has downloadable patterns and they are super cute.  It is www.youcanmakethis.com  I have a long list of ones I want to get done but since Christmas is around the corner I started with a Christmas one.  This will eventually be turned into a throw pillow to toss on my couch for Christmas.  No tutorial, just pictures!  Enjoy and I’ll go finish watching Cat In The Hat or Bob the Builder with a snuggly princess. 

PC130001

PC130002PC130003

jenni

Saturday, December 4, 2010

Vertical Ruffle Skirt

Christmas Dresses!  Always a time of great fun.  My daughter however, is very picky, and while she LOVES anything fancy and dressy, she hates things that are uncomfortable.  Give her a fun knit skirt and shirt any day and she will live in them for years until I finally throw them out from being completely worn out.  So, this year I decided to combine her love of comfort and love of fancy into one adorably wearable outfit.

Sunday, November 28, 2010

Christmas Ribbon Table Runner

Now that Thanksgiving is over, well except for the pies :), it's time for Christmas.  I love Christmas!

A couple of years ago I found a lot of great ribbon for really cheap after Christmas.  It's always nice to have some on hand for wrapping.  A few days ago as I was working on another project, I came across the ribbon again and had a light bulb go off in my head.  Why not weave them together to create a table runner.  So here it is, my Christmas ribbon table runner.  I love how it turned out.

Monday, October 11, 2010

Hot Pads

If you are anything like me you have lots of fabric scraps from other projects, or maybe some of those fabrics that were just too cute that you had to buy them and now you have to think of a use for them.  It’s one of those addictions that I’m okay with having.  It’s right there with chili infused chocolate, whoever created that mixture is a genius!

Okay, back to all those scraps.  Hot pads!  Perfect for scraps.  You can always use hot pads and they make good gifts as well. 

Tuesday, October 5, 2010

Fall Burlap Table Runner

Although it is still really warm outside, I know Fall is on the way!  I love this season for so many reasons…  Soup, cool breezes, beautiful colors, and the list goes on and on.  I was inspired by the leaves on the mountain just outside our door and the changing colors.  I wanted to do something to bring that feeling inside.IMG_7414

Wednesday, September 29, 2010

Super Hero Hooded Bath Towels

I love big hooded bath towels.  I have tried some other patterns, but they were so complicated and took forever.  A few months ago I was staying as my sis Jenni's house and she had a great hooded towel that she received as a gift.  The hood fit a toddlers head without covering the eyes and was simple.  So of course, I started investigating every seam and figured... I can do that.  So here it is.

Sunday, September 26, 2010

Flower Embellished Shorts

I found these really cute little shorts on clearance for my niece one day only to find out that she already had the exact same pair.  A few days later I was flipping through one of my friend’s scrapbook magazines and found these really cute flowers that they had created out of ribbon, buttons and paper.  I decided to change them up a little and add them to the shorts for my niece. 
You will need 3 strips of ribbon per flower.  I used the thinner ribbons so the flowers didn’t overpower the shorts.  I cut mine in 2 ½” lengths for the big flower and 1 ¾” lengths for the little flower.  Twist the ribbon into a loop and pin to secure.

For the stem and leaves, draw them onto iron on paper for appliqués, I use Heat-n-Bond Lite. 
Then iron them onto the back of a scrap of green fabric. 

Once they cool, cut them out and determine placement on the shorts.  Once you have them in place, iron them on.  You will then want to sew them in place using a blanket stitch.  I shortened the lengths of my stitches just a little just because the appliqués are so little.

You will then need to start placing your ribbon petals. 

Sew the middle petal in first using a close zigzag.

Then place and sew on the remaining 2 petals. 

Finish the flower with a button for the middle and enjoy! 

For the smaller flower, I twisted the petals the opposite way because of the print on the ribbon and to change it up a little.

I’m thinking I might change these up again and add them to pillows.  Stay tuned.


I linked up to


Saturday, September 25, 2010

The Everything Tote

I always seem to need an extra bag and never have one, so here is a quick and easy tote pattern so you always have a bag for everything.
2010-09-17_4584
What you need
All the fabric is printed outdoor fabric, or you could also use another heavy weight fabric.
3/4 yard of main fabric
1/4 yard of fabric for straps
1/4 yard for pocket and sides
1/4 yard of double sided iron on heavy weight interfacing
1 1/4 yards iron on interfacing
Matching thread
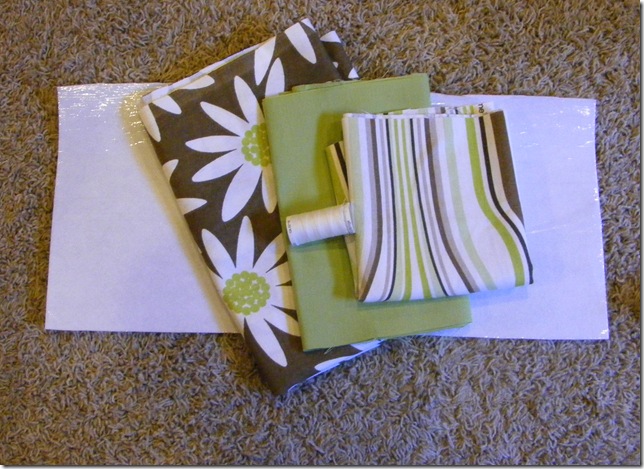
DSCF1321
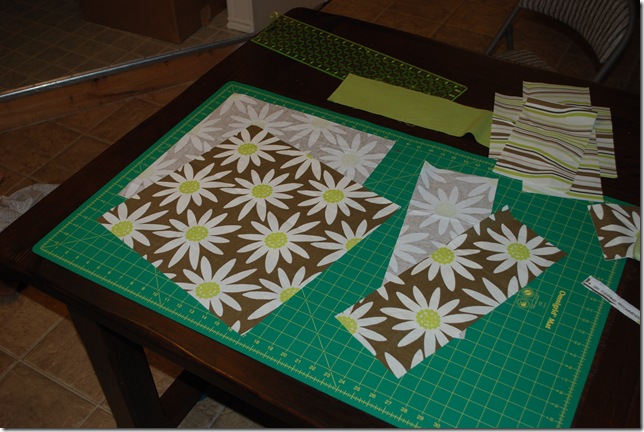
Your first step is to cut all your pieces to the right size.
Out of the main fabric cut two 14” by 16” rectangles, and two 6” by 16” rectangles
2010-09-17_4558
You then want to take your pocket fabric and cut one 8” by 10” rectangle, and two 6” by 14” rectangles.
2010-09-17_4553
Then for the straps you need to cut two 4.5” by 44” rectangles.
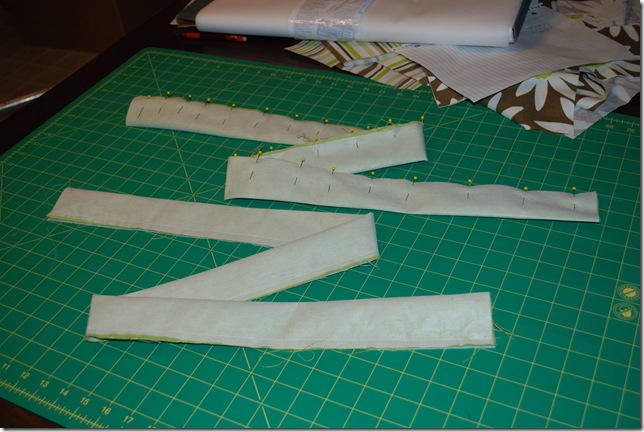
Also cut two strips of iron on interfacing the same size. Iron on the interfacing to the wrong sides of both straps. Then fold the right sides together and sew with 1/4 inch seam down the long side.
2010-09-17_4565
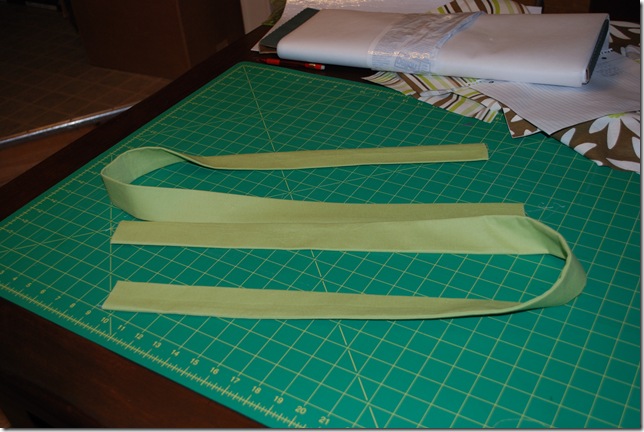
Then turn both straps right side out and press.
2010-09-17_4566
Next we take our main fabric and pocket and hem tops of all with 1/4 inch hem. (fold fabric 1/4 inch then another 1/4 inch and topstitch) 
Place your pocket 3 inches from both sides of main fabric and match bottoms. With basting stitch sew down both sides of pocket.
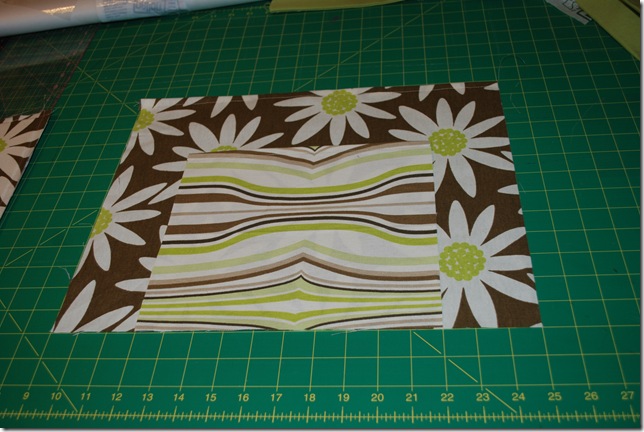
2010-09-17_4570
Pin on strap to from side of tote 2 3/4 inch from both sides of front.Then sew top stitch up the side around and back down the other side. Repeat on other side of strap.
2010-09-17_4571
Sew back strap the same as front strap.
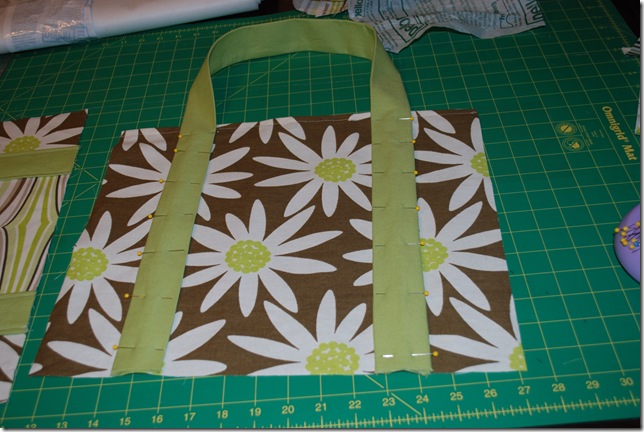
2010-09-17_4572
Next cut the double sided heavy weight interfacing 5” by 15'’.
Sew bottom fabric wrong sides together with a 1/4 inch seam, leaving one short side open. Slide interfacing into the pocket made by bottom fabric. Sew the last side with 1/4 inch seam.
2010-09-17_4568
Iron both side of bottom to fuse interfacing to fabric.
2010-09-17_4569
Take front of tote and bottom piece placing right sides together sew a 1/4 inch seam along bottom of tote. Finish all seams with a zigzag stitch.
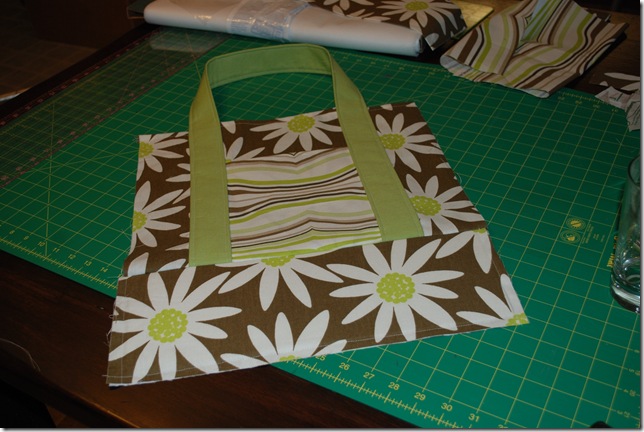
2010-09-17_4574
Next take the back of tote and sew right together and sew 1/4 inch seam.
2010-09-17_4575
Then take the sides of tote and sew wrong sides together with 1/4 inch seam. Press all sides of tote to finish off.
2010-09-17_4576
Now you have a great tote to use for anything your heart desires.